By Dick Davenport
When last we met, I was working to get the engine compartments together. Many of the “worst case scenarios” came true in this build. I found a series of YouTube build videos by MM Scale Models of another configuration of this kit, which was helpful in figuring out some steps and anticipating/avoiding some disasters. Nevertheless, anything that could go wrong did. The tail wheel was very vulnerable: the back portion of the strut broke several times and had to be re-glued; the wheel popped out and had to be reinstalled several times; ultimately the assembly came out and I set it aside to put back in place with 5-minute epoxy near the end of the project.
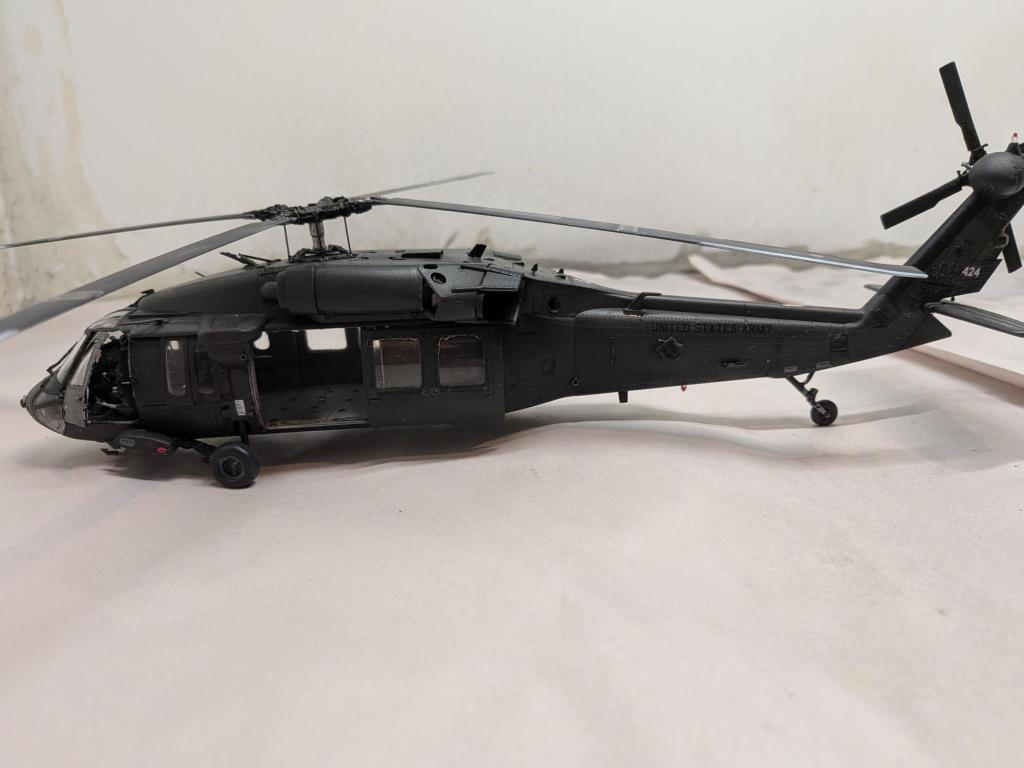
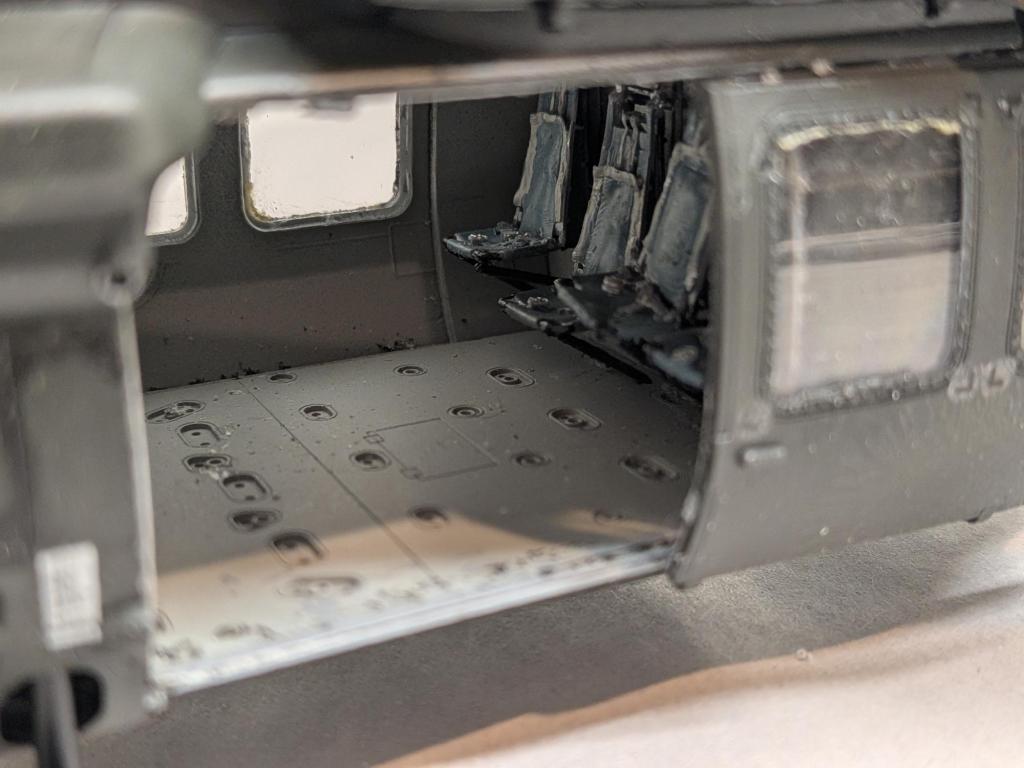
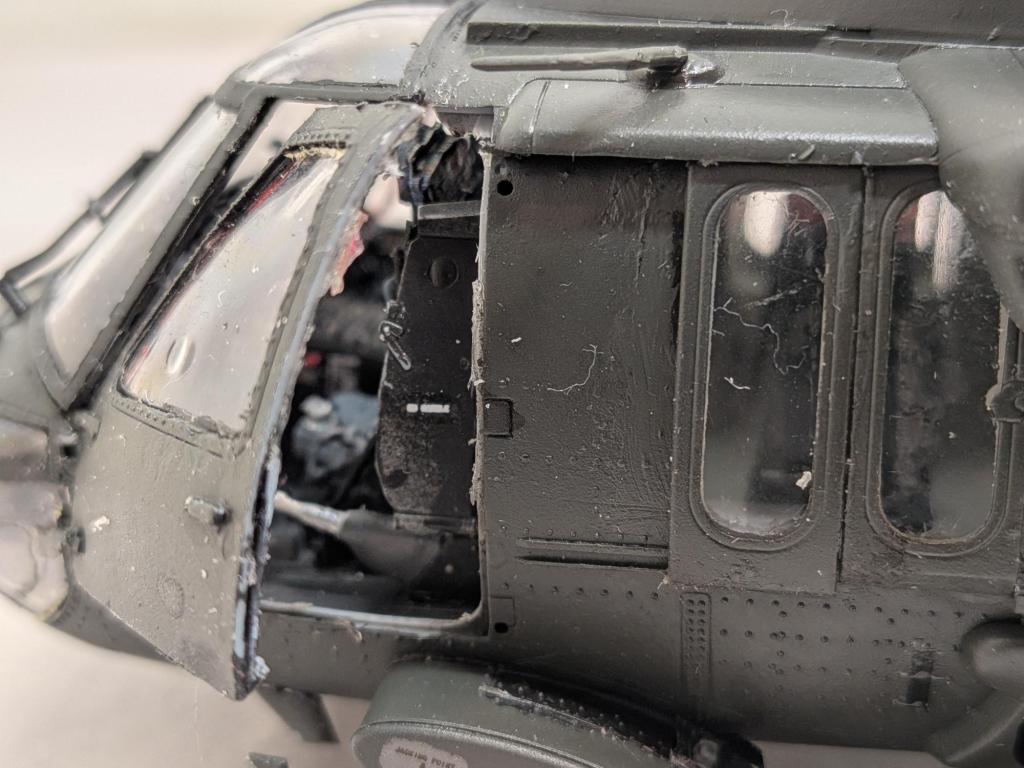
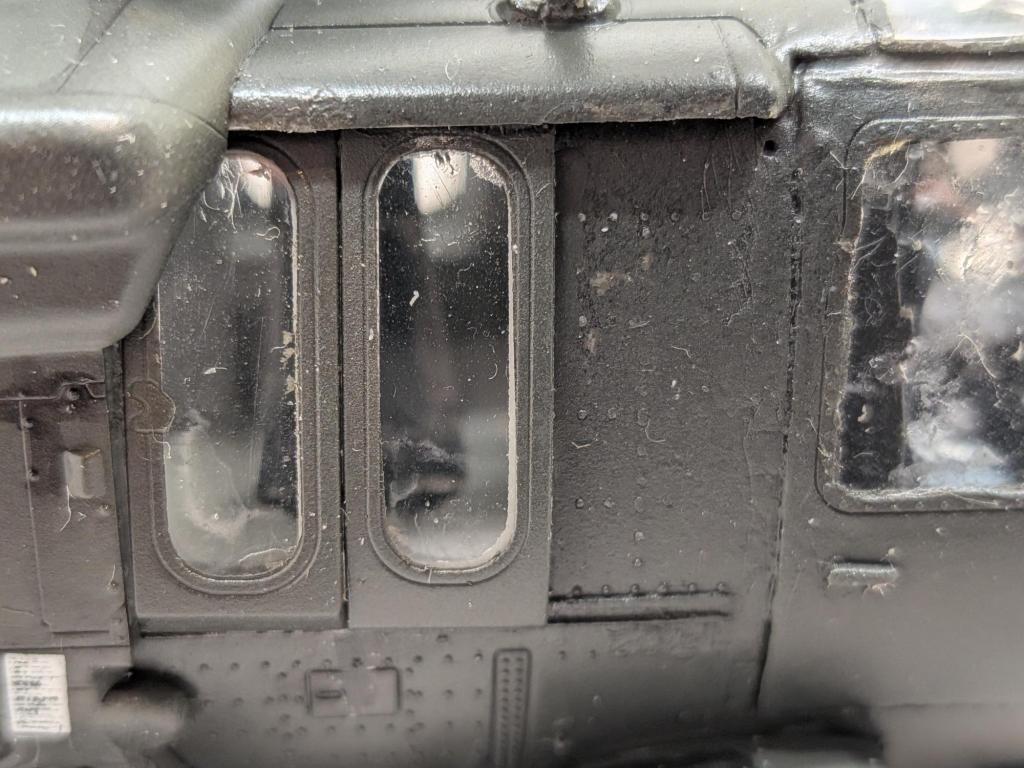
I painted the interior Vallejo Light Gull Grey (71.121) and Mig RLM 02 Grey (A.MIG-217) before installing the windows, so I didn’t use the interior masks. The exterior masks fit perfectly. I decided to display the Black Hawk with the starboard doors closed and the port-side doors open; these I glued in place with canopy glue. Once the doors were in place, there were a lot of “fiddly bits” — antennae, pitot tubes, etc. — that needed to be installed before painting. These all invited being knocked off numerous times. With all of the handling, the starboard cheek window got pushed in. Fishing it out and reinstalling it took a lot of patient coaxing over a couple of days. Finally, the exterior was ready for paint. After a coat of black primer, I applied several light coats of AK Air US Army Helo Drab FS 34031 (AK11872). Next came several light coats of Alclad Aqua Gloss Clear (ALC 800).
The primary decals went down without any problems, but there are literally dozens of small stencils all over this aircraft. The call-outs on the instruction illustration are very small, very faint and very vague as to where they point. Besides, the print of the decals is extremely small and illegible, resulting in a small black spot on a dark green background. In other words, meaningless. I decided to limit the decals to ones that impacted the final appearance. Panel lines were already pretty well distinguished, but I accented them a bit more with a thin black wash. Then a few light coats of Model Master Acryl Flat Clear (4636).

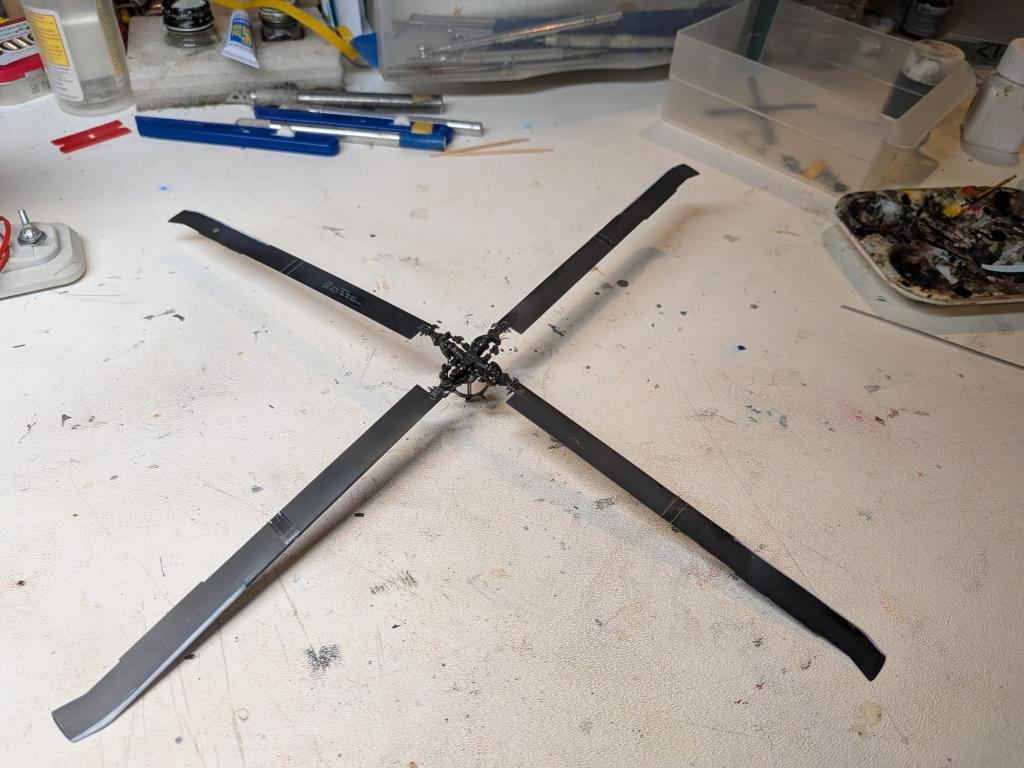
Then it was time to turn attention to the main rotor. The rotor shaft is two parts, however, the shaft itself is not very strong and tends to bend out of alignment easily. The hub, parts C23 and C24, connect to a ring, part C69, by a set of four rods, E10. How they went together was very vague and took examining photos for a long time to figure it out. The connection point on C24 and C69 was only a small indentation. I knew that trying to get all the pieces lined up and glued together was an impossibility. I drilled holes through C69 and into C24. Then I inserted pieces of 20 gauge black wire through the parts. When everything was in place and aligned, I super-glued the wires and cut off the excess from the bottom of C69. Voila! In place. Aligned. Attaching the rotor blades was the last step and not a problem.
Finally, time to remove all the masking, polish the windows, open the port doors, attach the resin main wheels, and reattach all the “fiddly bits” including the rear wheel assembly. Of course, attaching the rear rotor had to become a problem. The shaft in the tail boom popped loose and dropped down inside somewhere. So I glued a piece of brass rod into the rotor, inserted it in the tail and used some canopy glue to hold it in place. The main rotor simply slips into the transmission.
Done! And it only took three months, from September 5 until December 9.

This proved to be the most complicated and difficult build I’ve ever undertaken. Don’t look too closely, because a lot of the flaws are evident, but I’m satisfied that it’s the best of my ability, reasonably close to what I envisioned, and will be acceptable on display at the Grand Ledge National Guard Armory.


Leave a comment