By Norm Witte
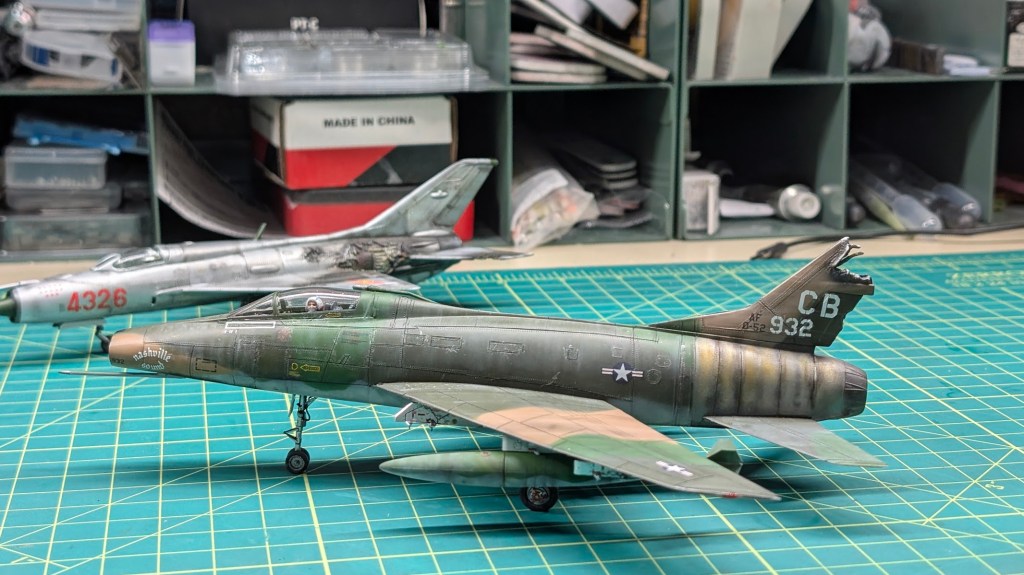
In the back of the lot, parked right next to a low-mileage MiG-21, we have this gently used F-100, driven to church on Sundays by a little old lady. It started out life as part of IMC’s “battle-damaged” series of 1/72 aircraft and has all the inaccuracies you’d expect of a kit from that period, which is exactly why I like it so much. I had one when I was a kid, and now I have another one. The kit I have is actually a Lindberg re-release of the original IMC kit; the only difference is this one is molded out of soft white plastic instead of the hard silver stuff.
The mission creep begins when I start gluing this thing together. It fit together exactly like a modern Tamiya kit doesn’t, which necessitated filling and sanding. This, of course, led to scribing to replace lost detail and to me concluding that it wouldn’t take that long to scribe the whole thing, because it’s only 1/72 scale. This also led to the creation of the gun ports and nose radar that were absent from the model.
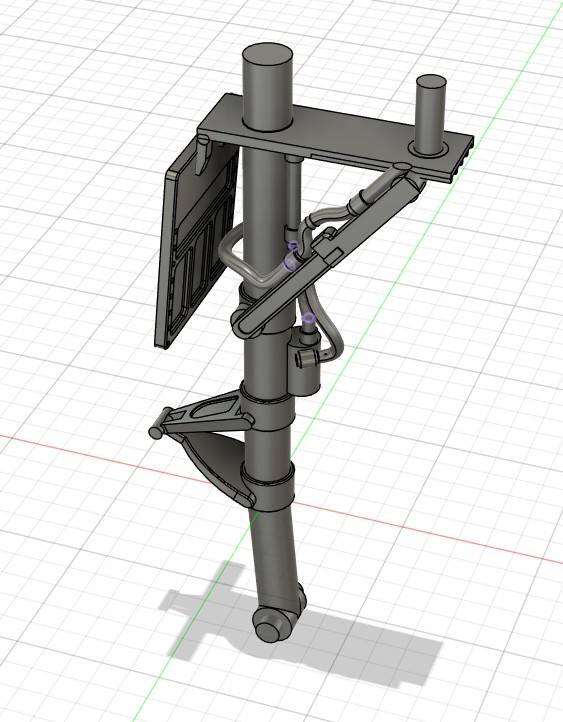
Somewhere in this timeframe, I found out that I was missing one of the main landing gear legs, basically a peg with some rings around it and a right angle at the bottom. Trying to find an aftermarket solution went nowhere, which led to conversations with my son Seth and Chris Long. Having fallen in with bad men, I decided the most reasonable solution was to buy a Elegoo Saturn 4 16k resin printer and associated paraphernalia. I really had no other choice at this point.
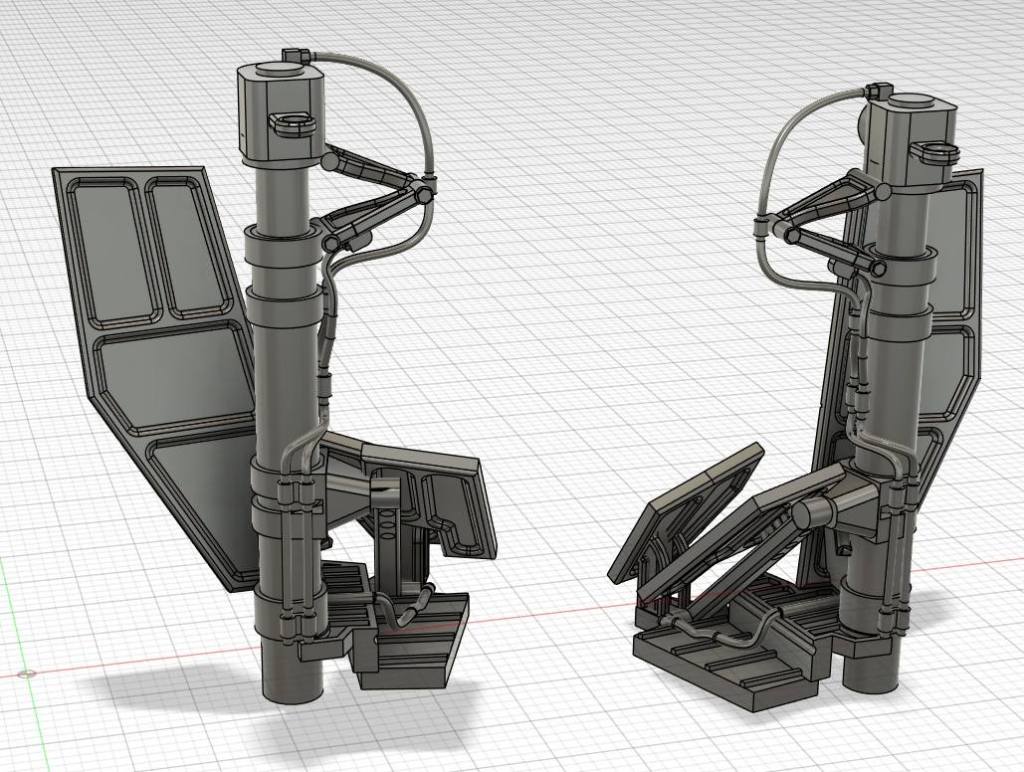
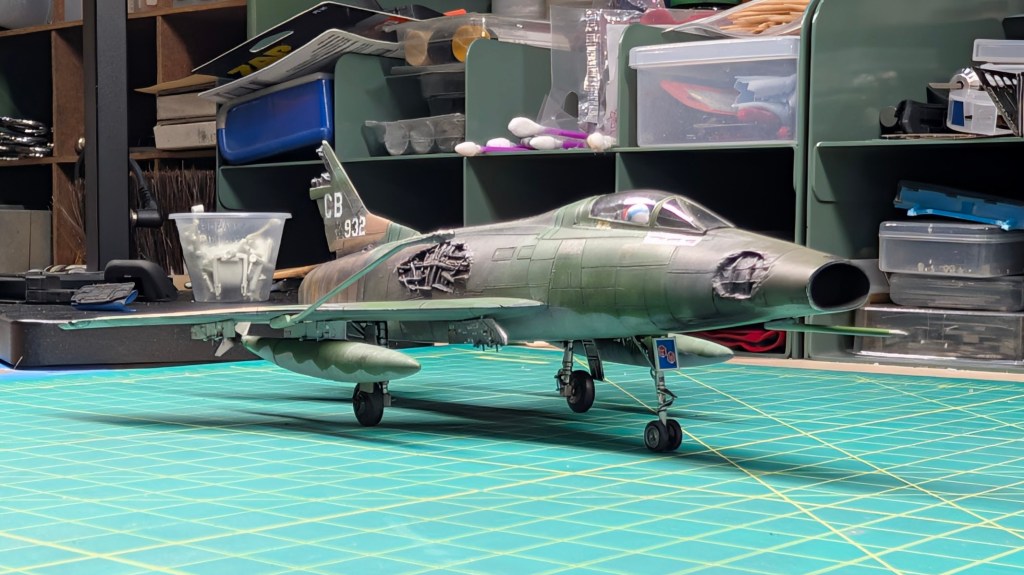
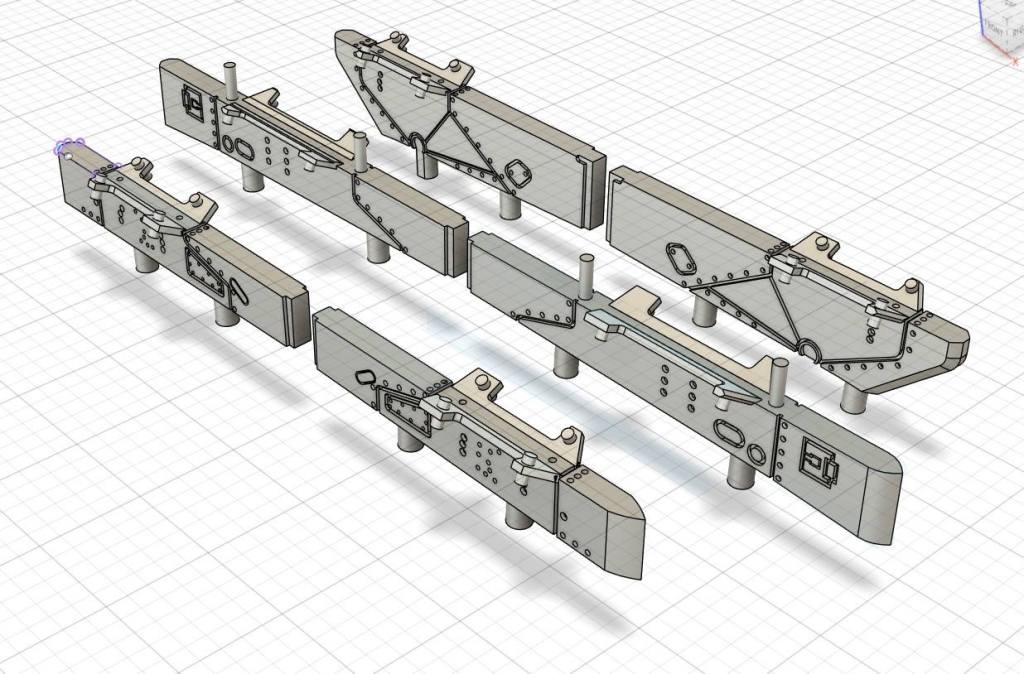
The nitrous oxide bottle having been blown wide open on the mission creep motor, I decided that not only would I print landing gear, but I would greatly improve the landing gear, which included adding a retraction arm and two doors that covered that mechanism. This meant digging out the molded-in doors that were part of the wing. While I was at it, the nose gear of course needed improvements. At this stage, I couldn’t leave the wing pylons as the molded blobs of plastic included in the kit. Besides, they were attached to the kit wing stores, which (a) sucked, and (b) made no sense, because I can’t see a battle-damaged Hun landing with four bombs still on the wings. So, at Seth’s suggestion, I downloaded Fusion 360 and figured out how that works, at least a little bit.
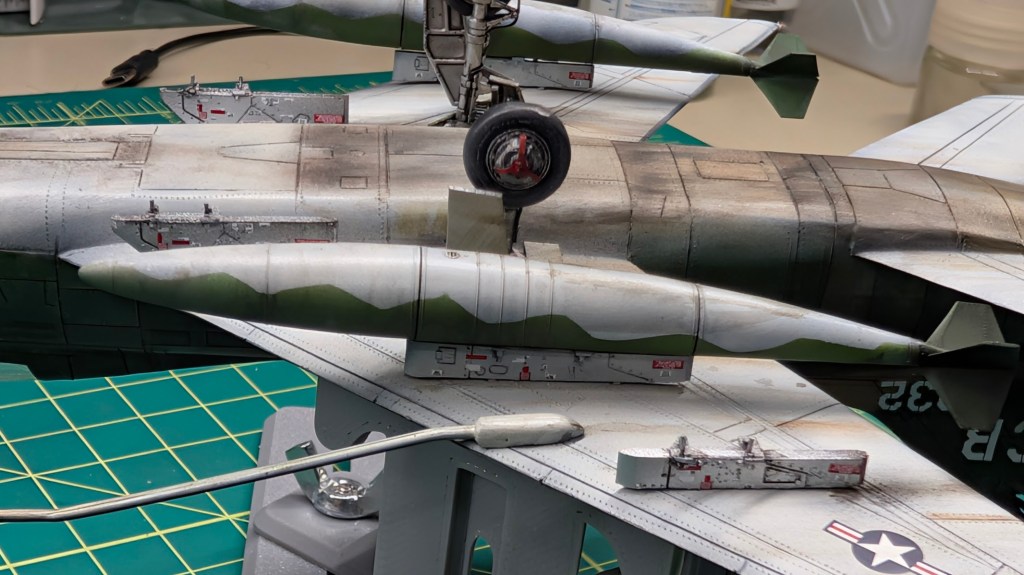
Because the crazy train had left the station, I ordered ResKit wing tanks and wheels. Nothing is too good for the F-100C (if you look closely, that’s what it is) pretending to be an F-100D.

One of my Corvair friends, Rick Norris, was a maintenance tech on these in Vietnam. He was really helpful, sending me a lot of pictures and answering lots of questions. I ended up ordering two sets of decals, because I always do stupid things like that. One set was the Caracal Vietnam collection. It had markings for a plane from the 90th TFS, which was Rick’s unit, so there was no question which one I was going to build. The other set of decals were for some bare metal birds from Furball. These had the technical decals for the pylons and the guide fortunately had some really nice drawings I used to model the pylons themselves.
I then proceeded to print dozens of sets of landing gear and pylons, making tweaks along the way. Quite a few got painted before I decided they weren’t quite ready for prime time.
I tried Mr. Surfacer 1500 black primer for the first time, and I really liked it. I pre-shaded over that with a Tamiya flat gray. I used blue tack to mask off the SEA paint scheme, and sprayed that with AK Real Colors acrylic lacquers, which I also really liked. This was a good exercise because those paints all went down really thin. I’ve been scribing pretty wide and deep because some of my first attempts didn’t do that well with the paints I experimented with on the F-105. Now I know I need to scribe lighter and thinner. I now have a Tamiya .1 mm engraving blade to use in place of the .2 mm blade I’ve been using. Whenever I get back to the practice F-105, I’ll use the .1 blade to scribe the remaining wing, which means the scribing on that model will be very inconsistent, but that’s ok. Its name is “Practice.”
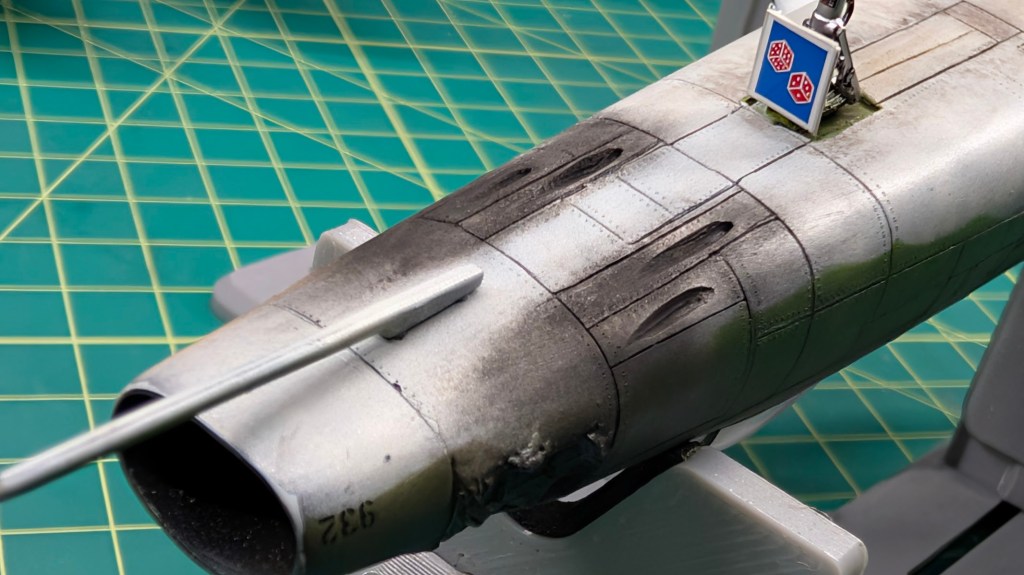
The F-100 afterburner was famous for burning the paint off the outside of the plane. I’ve seen some impressive models that depict the paint partially burned away, but this plane was destined to be a beater, so I decided I wasn’t going to get that fancy. The base coat on the metal areas was SMS stainless steel. I also like their paints a lot and about two hours ago five more bottles of their stuff showed up. I did some additional shading with Tamiya gold titanium and black.
Everything got a coat of Future floor wax so if we wanted to dance on it, we would look elegant. Then I got to putting decals on. I decided not to do a panel line wash because the crevasses were so deep that the panel lines already popped plenty enough.
I sealed in the decals with Tamiya semi-gloss and then got to work weathering with oil paints. I’m really sold on using these and, if you’re thinking about it, you should give them a try. It’s easy and you can pretty much wash away anything you don’t like, or at least significantly attenuate it. You simply put dots of paint on (I am using both tube oils and AK Oilbrushers), then sweep it with a brush wetted with mineral spirits. I’m using the exotic Home Depot mineral spirits because it comes in a gallon can and should last the rest of my natural life.
After some oils, I added the landing gear, wheels and tires, pylons, tanks, pitot tube and refueling probe. The final weathering touch was applying some pastel chalks. The oils are subtle, the pastels even more so, and they have this dead flat to them that looks very realistic. Again, it’s so simple, even I can do it. You rub the pastel chalk on a piece of sandpaper, which makes pastel dust, and brush it on the model with a paint brush. This really makes the battle-damaged areas look more realistic.

As completed, I now have a quaint beater F-100. I’m satisfied.


Leave a comment