ICM 1/48th UH-60A Black Hawk
by Dick Davenport
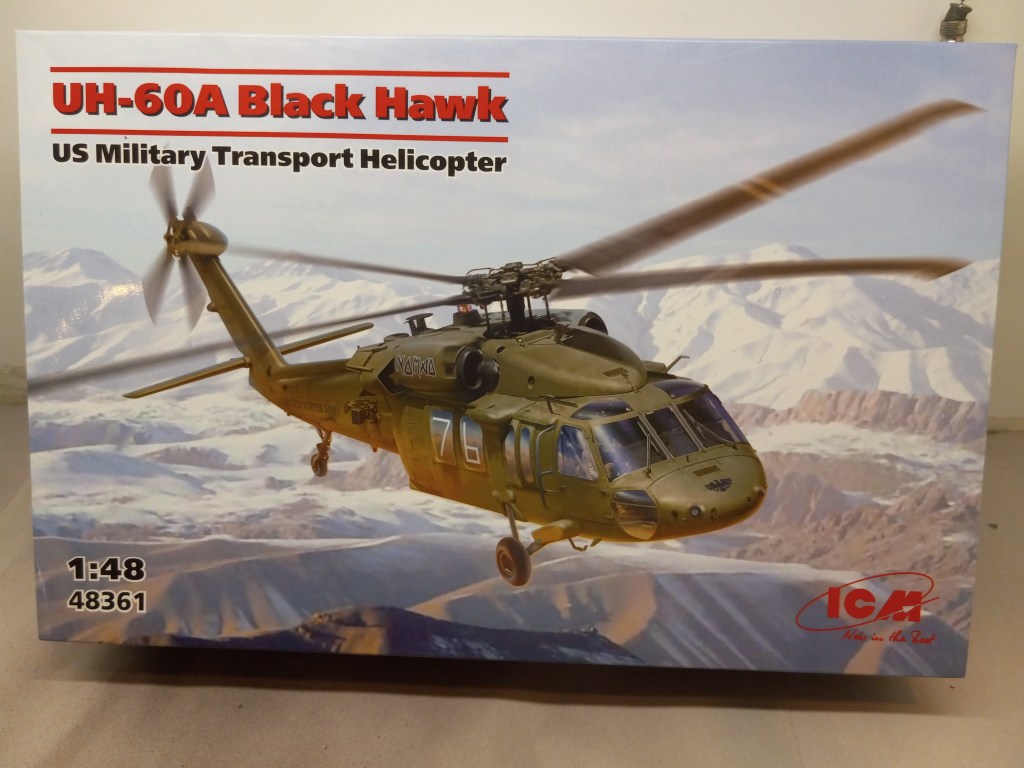
A few of us have taken on building a display for the National Guard unit in Grand Ledge, just west of Lansing. The unit has a number of helicopters, including Eurocopter and various configurations of the Sikorsky Black Hawk. I opted to build the UH-60A transport version of the Black Hawk using a kit by ICM of Ukraine.
At the time, the best option I found was through Super-Hobby.com out of Poland. They had the kit at a decent price, and various accessories such as a set of 3D printed resin seats, a set of 3D printed decals by Kelik (also from Ukraine), and complete set of interior and exterior masks by New Ware from the Czech Republic. The add-ons came pretty quickly, within a couple weeks. But I waited and waited for the kit.
At nationals, Squadron had a big stack of the ICM kits. “Do I go ahead and buy one now, knowing my order will be waiting for me when I get home?” I resisted. The kit wasn’t waiting for me when I got home. In fact, it was 3 months before the full order finally arrived at my doorstep.
This is a monster kit. The box is 17″x11″x4″, containing 475 parts. It’s designed to be built in several different configurations in different boxing, so there are a number of parts that aren’t used for the UH-60A, but that still leaves a bunch! The instruction book is 20 pages of 8.5″x11″ illustrations for a total of 95 steps, with markings for 3 aircraft including Montana and Kentucky National Guard. The book includes patterns for making your own masks.
After I cleared some other projects off my workspace, I could start on the Black Hawk. As is often the case, the first steps are building up the cockpit. Here, the 3D printed seats and instrument panels add a lot of nice detail, though the kit detail is quite good on its own.
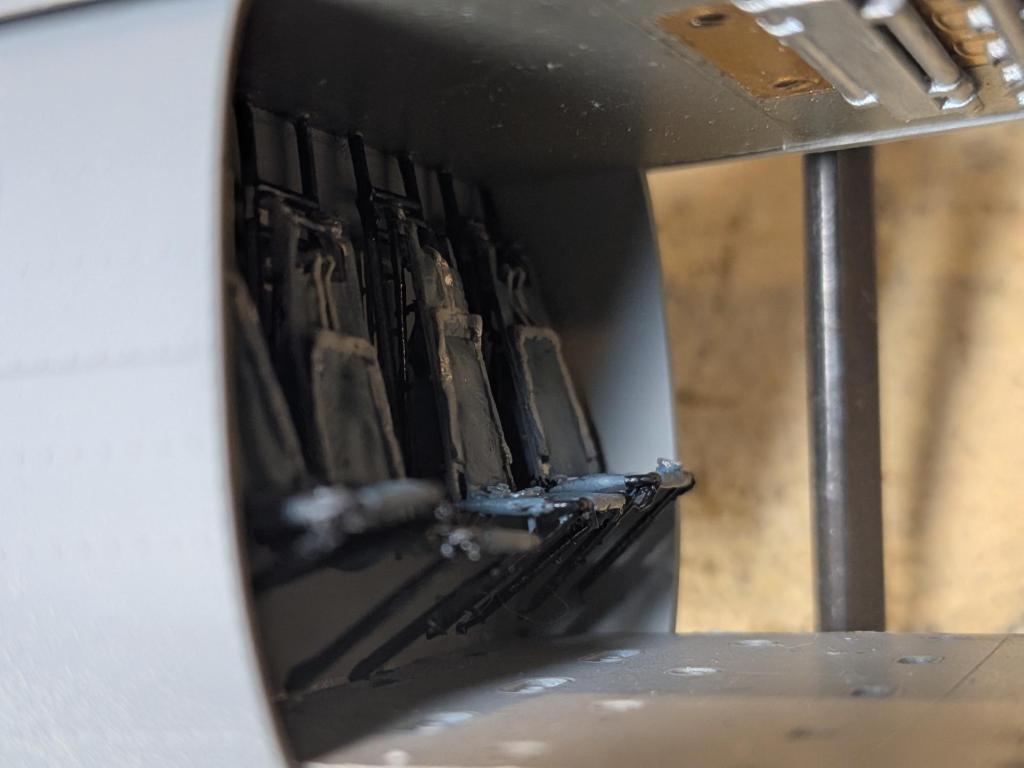
Beyond that point, the build has been a real challenge. The seats in the main cabin are first mounted on the ceiling, then the ceiling and floor are attached, then the seat legs are lined up and attached to the floor. Very frustrating. You’re supposed to mount the rear rotor on the starboard fuselage before you close up the fuselage, which means you’re likely to break everything off before you’re done. To avoid that, I simply glued the shaft in place and will mount the rotor at the end. The tail wheel is assembled, then inserted in the tailboom as the fuselage halves are joined, but the pins of the wheel strut don’t fit in their place inside. The cockpit doors have tiny pins for the hinges, which break off easily. Getting the doors in place required a lot of pressing and coaxing, which meant the windows popped out.
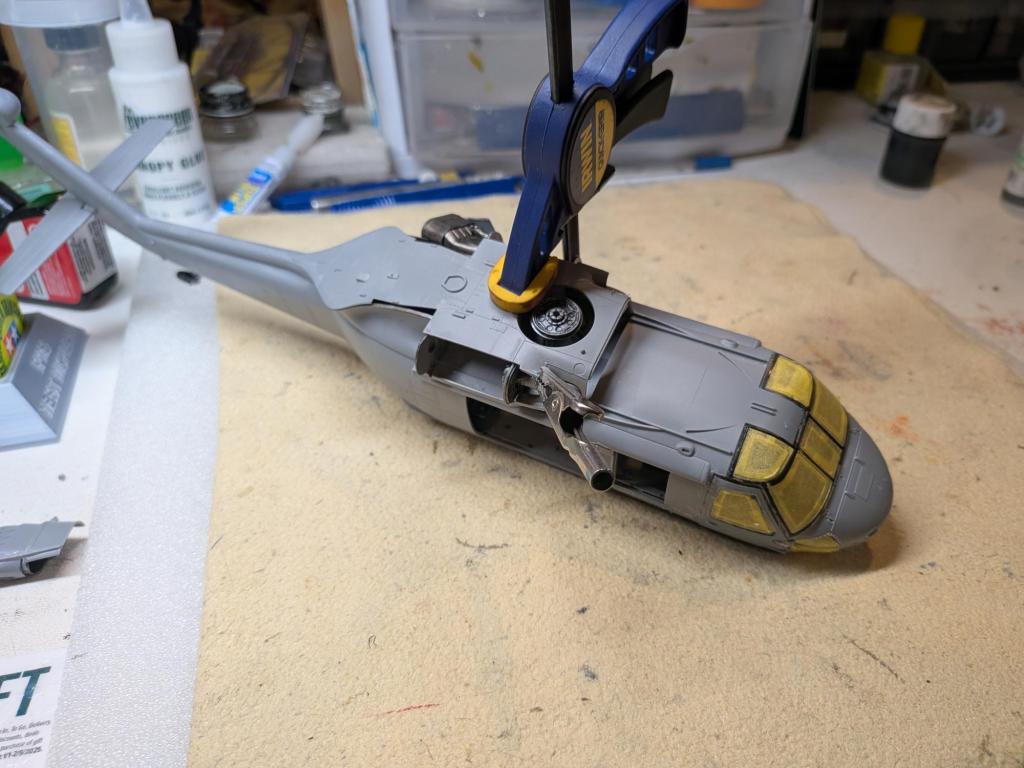
Right now, I’m trying to persuade the panels covering the engines into place. In the process, the exhausts and intakes pop off. The port side seems to be in place now, but the starboard panel has a big gap and I’m trying to figure out why and how to close it.
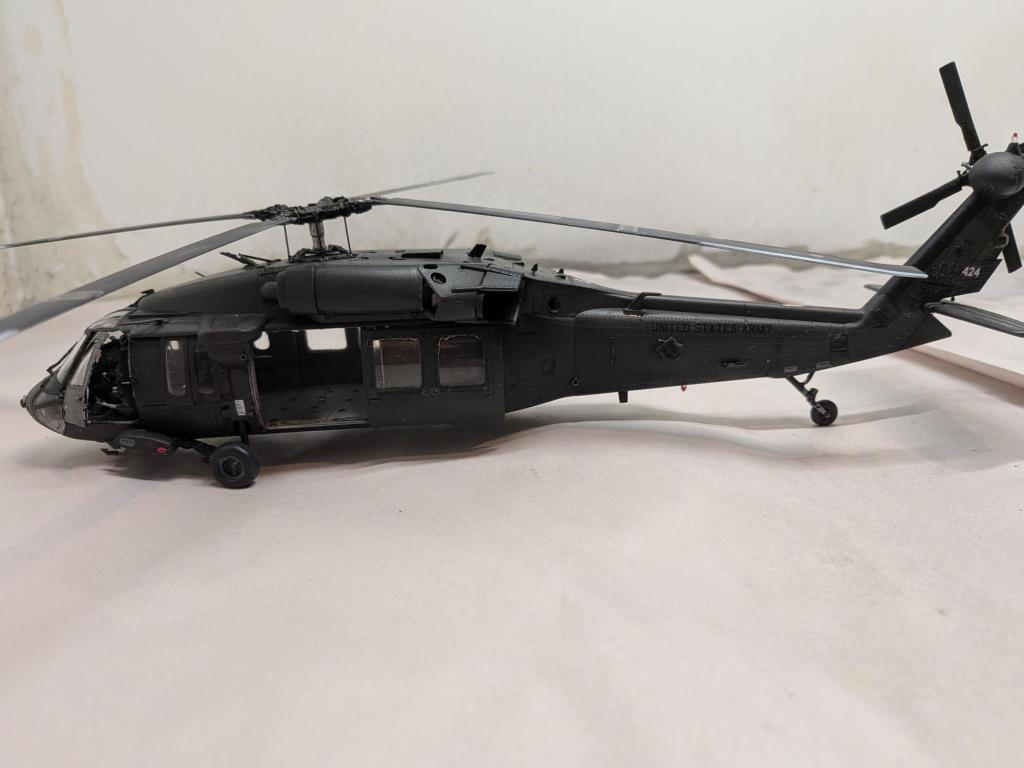
I’ve been at this for two months now. I’m hoping I’ll have it done by the end of the year and, that when it is, it’ll be worthy of display at the Grand Ledge Armory. I’ll keep you posted.


Leave a comment